Tuesday, June 30, 2015

A Gift For You by Karen Maldonado

3:30 AM 1 Comments

Hi Cheery Lynn friends!  It's Karen sharing a lovely gift card with you today!
It can be used for any special occasion.  
This one is for that special coffee or tea lover!


I started by making a 5.5 x 5.5 card based and then layered the designer
paper right on top, and stitched some crazy stitching using my sewing machine.

Then, I die cut the A2 Frames Rectangle Scalloped
along with the Card Maker Rectangle Classic and layered the Scalloped piece 
to the bottom.  Then proceeded by cutting a 1.5 strip of designer paper
 to go across the card.  I tucked the Border Carnivale and layered 
that piece right beneath the strip of paper.

Next, I took the Card Maker Rectangle Classic die and put as the next layer.
The final layer was cutting the B546 Royal Scandinavian Tag 2 and stamping
the sentiment on top, and adding a few pearls!

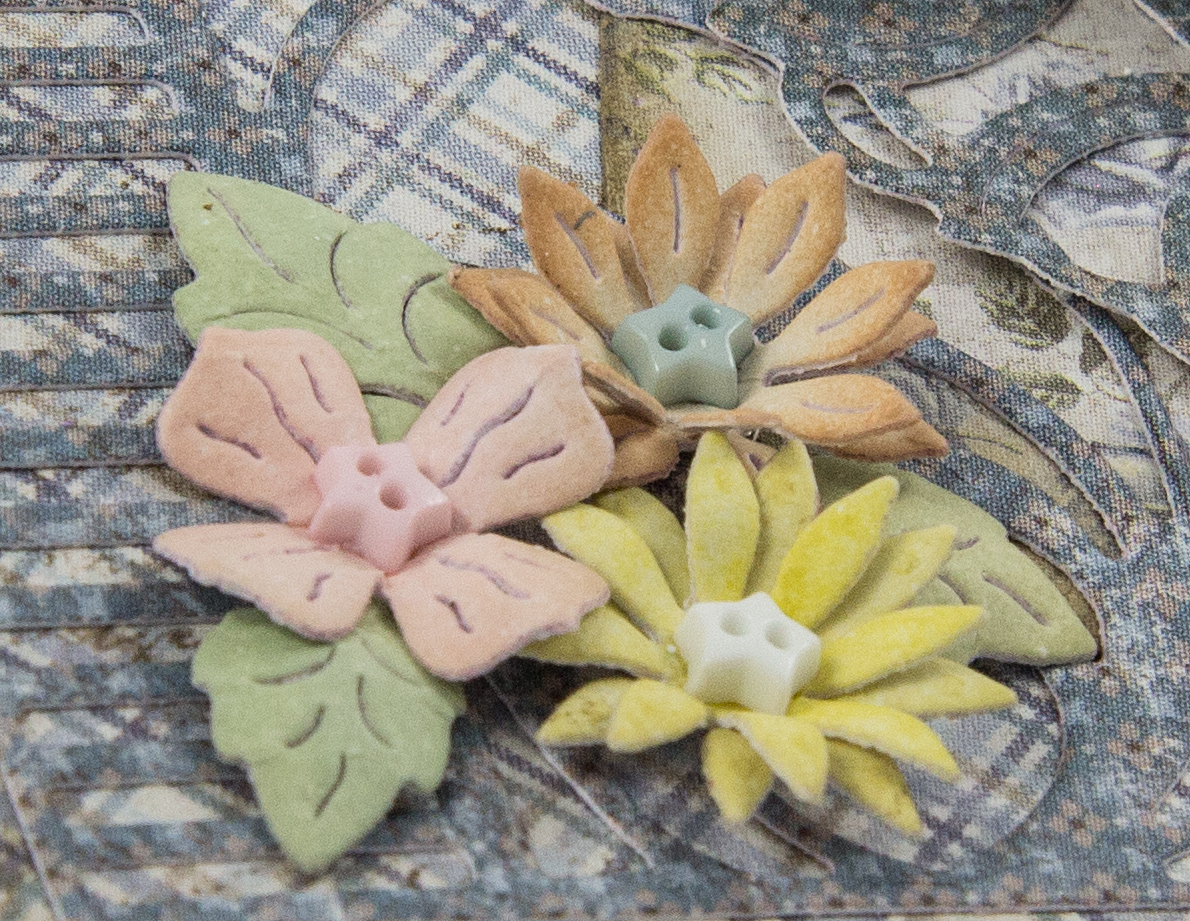
Finally, I made two sweet distressed flowers using 
the Judy's Bloom &  Leafy Flourish dies, added some seed beads for the centers!
Finished the card off by making a pretty distressed crinkly ribbon! 


Just need to add a gift card inside for that special person!

Cheery Lynn dies used:

Come and play in this week's challenge "Christmas in July"
for a chance at a $20 spending spree to the Cheery Lynn on-line store!!

Can't wait to see what you all create!!

Enjoy your day!

Hugs & Smiles,

Monday, June 29, 2015

Christmas card by Eva Dobilas

3:30 AM 4 Comments

Hi there, this is Eva and today even though it's hot in my neck of the woods, I have a Christmas card to share with you.  My card base is a 5.5" square.

I started out with cutting a Nautical Wheeler Doily out of white card stock and layered a panel on top of it.  Than I die cut Pierced Stacker #3 and gold embossed my sentiment on it.  I die cut a Gardenia Strip out of red card stock and created my flower.  I also die cut the fringe from the Black Eyed Susan Strip and created the middle of my flower.  Than I die cut a Chrysanthemum Strip and created two little flowers.  I finally die cut a Rose Leaf Strip and used two of the larger leaves and a Leafy Flourish out of gold glitter card stock and added them to my card.


Hope you enjoy this little card as much as I enjoyed creating it.

Here is the list of the supplies I used to create this card:


Thanks for stopping by and good luck to everyone for entering our Weekly Challenge with a chance of winning a $20 spending spree here at Cherry Lynn Designs.

Hugs,
Eva

Sunday, June 28, 2015

Cheery Lynn Designs Challenge 191 - Christmas in July

3:30 AM 2 Comments
As always, the entries we had last week for our Anything Goes challenge were wonderful.  Thank you to all who entered, we enjoy seeing your creations with our dies.  This week our challenge at Cheery Lynn Designs is

Christmas in July

Here are the rules:
  • You MUST follow the theme and use at least one Cheery Lynn Designs die, of course, we would love to see more than one. 
  • You MUST add a link to your blog post in the InLinkz at the end of this post; no back posting, only new projects are allowed
  • You MUST link to this challenge in your blog post or on your gallery post
  • You may only enter the challenge ONCE per week.
The winner will be chosen randomly. They will receive $20 towards shopping at the Cheery Lynn website. The challenge will end on Saturday night at 18:00 Eastern time.  And now to our inspiration for today (for details on each project, click on the designer's name and it will take you to their blog)

Debbie Brownmiller
Dies used:
Remember, you MUST use a Cheery Lynn Designs die to enter this challenge.

Anything Goes Challenge Winner

3:25 AM 3 Comments
What fabulous entries we had last week. Using Random.org, the winner of our Anything Goes challenge is

Random Integer Generator

Here are your random numbers:
10
Timestamp: 2015-06-28 00:28:56 UTC
Congratulations, Sonia.  Please contact me for your $20 shopping spree to Cheery Lynn Designs.  Be sure to grab the winner's badge from the right sidebar for display on your blog.  And thank you to everyone who joined in on the challenge.  We hope to see you again in this week's Christmas in July challenge.

Saturday, June 27, 2015

Pretty Bows by Julie Lavalette

3:30 AM 1 Comments

Hi Everyone, It's Julie here today sharing with you my latest vintage style card.


This photo shows you the start of my layers. You will see I have shaded the edges with Distress Ink and used my Distress tool around the edges of my card for a shabby look.


My Butterfly I used embossing powders on and added a little button onto the centre.


My bow once die cut out I tattered the edges with my Distress Tool adding a little ink to the edges.


My flowers were all shaded with Distress Inks and shaped using my embossing mat, adding little buttons into the centres.

Cheery Lynn Dies Used:


Thanks for stopping by to see my post today and good luck to everyone entering our weekly challenge.


Julie x

Friday, June 26, 2015

Encouragement Card by Corina Finley

3:30 AM 1 Comments

Hello and Happy Friday to you!

I have created this weeks card to showcase the ease of layering with Cheery Lynn Dies. I have used the Pierced Stacker #3A2 Frames Rectangular ScallopedA2 Frames Rectangular Classic and Sentiment Frame #2

Simply cut and stack!


I tried to recreate the flowers from the pattern paper. For the large flower, I cut the Small Gardenia strip flower. I used three layers from the strip die. I inked one layer dark pink, one light pink, trimmed one and also inked lightly with the dark pink. The center of the large flower and yellow flower is from the Tiny Flower Kit.

The foliage for the large flower is cut and trimmed using the Build a Flower set. The small yellow flower center and foliage is hand cut. I added the Add a Flourish to top and bottom to draw your eye to the center.


Dies used:

Pierced Stacker #3 (Set of 6) - XL-21


I hope you will play along in our weekly Cheery Lynn Designs Challenge 190 - Anything Goes. You could win a $20 shopping spree at the online Cheery Lynn Design Store.

Thanks for joining me today!

Take care,
Live, Laugh & Create

Thursday, June 25, 2015

One Kind Word by Jenny Alia

3:30 AM 3 Comments

Happy Thursday!  It's Jenny here sharing a card inspired by the colors of my design paper.  I cut the leaf paper and before adhering it to an A2 card, I used the Curved Border die to cut the small holes pattern on the right side.  Then I cut a strip of blue paper and glued it on the left side.  It makes the card front look like a book cover and I like the pop of color it adds.


I made the flowers but cutting multiple layers of the Judy's Blooms die.  The centers were colored by blending distress inks.  I then used a spray bottle to spritz the front and back of the flowers before I crinkled the petals and then I let them dry before stacking.  I added green centers cut from the Build a Flower Embellishment #2 die.  The branches were from the same Build a Flower die.


I stamped the sentiment in black ink and then cut it out with a small Pierced Stacker 4 die.  The shape and pierced edge almost mirrors the subtle design on the right that was cut with the Border die.  I used the Pierced Stacker 4 die as a stencil and colored the center with distress ink and then popped up the sentiment with foam adhesive.

Cheery Lynn Designs Dies

Thanks for visiting and don't forget to join in this week's Anything Goes Challenge for a chance to win $20 towards shopping at Cheery Lynn Designs.  

Wednesday, June 24, 2015

You Are Beautiful With Lisa Blastick

3:30 AM 1 Comments

Hi, It's another Wednesday with Lisa. Today, I'm sharing with you a new card for Cheery Lynn Designs. This week challenge is "anything goes" so I thought I would try to make a scenery in the summer. I used a Window, Ivy, Little Flowers, Butterflies, Fence, Grass, Clouds and A Little Bicycle. Whew! 
I haven't made a scenery card before, but I have seen many of them. Giving it a try myself, I can really appreciate all the love that goes into each tiny piece. 


There are 7 sets of red flowers diecut from the "Baby's Breath Flower Kit" I added liquid pearls in the center of the flowers. There are 4 "Ivy Flourishes" 2 layered on each of the top corners. The "Victorian Picket Fence' was cut to fit and 2 layers of "Grass Border" on top. They were also cut to fit the 5 x 6 card. The "Window A" was diecut in white and then glued to Kraft Cardstock. I then cut the window pieces out in a red patterned paper and then in the red cardstock for the windows. The red cardstock was crimped to represent window curtains. I then layered the top of the window with "Dutch Daisy Set" and finished it with a bit of black cardstock cut thin with scalloped scissors. 


The "Little Pink Bicycle" was cut 3 times in red, black and Kraft and layered on top of each other. I added 2 little clouds from "Clouds and Rain" and printed up the title from my computer. The tiniest butterfly from " Mini Dimensional Butterflies" was diecut in black cardstock, I added 5 of them to finish this summer card. 


Cheery Lynn Diecuts Used:


Thanks for stopping by today! Hope you enjoyed! 
Be sure to stop by Cheery Lynn Designs Blog and enter this week's challenge "anything goes" for your chance to win $20 at the Cheery Lynn Designs store
Have a great week!
Hugs, Lisa


Tuesday, June 23, 2015

Blessings by Karen Maldonado

3:30 AM 1 Comments

Hi there Cheery Lynn friends!  It's Karen here today sharing a shabby
'blessings' card that can be used for several occassions!

To start, I layered, from bottom to top. the  French Pastry Doily
and Circle Classic Silver Stacker.  Then, I took the 
Circle Classic Small Silver Stacker and placed on top of the 
French Flair Little Stacker, and then die cut both pieces at the same time.
This creates an open center, so you can see the background paper
that I used on the bigger Circle Classic Stacker.

Then, I made two flowers using the Black Eyed Susan Strip
along with the leaves from the Frangipani with Leaves die set.  
To the center of each flower, I used the Embellishment #1 set and then
added a shiny and sparkly rhinestone center to each distressed flower!

and die cut one of each and placed behind the flowers.  I distress inked
some crinkly ribbon to match the card colors and finished the card by
distressing the edges!


Cheery Lynn dies used:


Make sure you join this week's "Anything Goes" challenge
for your chance at winning a $20 shopping spree

Have a beautiful day & I will see ya next week!

Hugs,
Karen

Monday, June 22, 2015

Daisies and a Butterfly

3:30 AM 3 Comments

Sandy with you here today, filling in for Eva.  I have another floral card for you, this time showcasing my Daisy Strip die.  I die cut the Daisies twice out of white card stock and then added color with my Copic markers. Next, using a Stylus tool, I shaped the petals from the back side.  I layered 2 large and 2 small for the center flower and then 2 medium and 1 small for the other two flowers.  I added a bit of Spiced Marmalade Stickles to the center of each. 


I began with a 5 x 7 inch green card stock base, adding a DP panel 4.75 x 6.75 inches.  Using green card stock, I die cut my Tiny Bubbles border as well as two Double Scalloped Borders.  I used Spray Adhesive to attach them to my card.  I used my Rose Leaf Strip and both of the Mini Fanciful Flourishes for some greenery.  Using one of the butterflies from my Small Exotic Butterflies #2 w/ Angel Wings set, I created this beautiful butterfly.  I used white card stock and added color to the butterfly as well as the leaves.  

Be sure to enter the Anything Goes challenge for a chance to win $20 towards shopping at Cheery Lynn.
 
Cheery Lynn Designs dies used:

Sunday, June 21, 2015

Cheery Lynn Designs Challenge 190 - Anything Goes

3:30 AM 2 Comments
As always, the entries we had last week for our Keep it Krafty challenge were wonderful.  Thank you to all who entered, we enjoy seeing your creations with our dies.  This week our challenge at Cheery Lynn Designs is

Anything Goes

Here are the rules:
  • You MUST follow the theme and use at least one Cheery Lynn Designs die, of course, we would love to see more than one. 
  • You MUST add a link to your blog post in the InLinkz at the end of this post; no back posting, only new projects are allowed
  • You MUST link to this challenge in your blog post or on your gallery post
  • You may only enter the challenge ONCE per week.
The winner will be chosen randomly. They will receive $20 towards shopping at the Cheery Lynn website. The challenge will end on Saturday night at 18:00 Eastern time.  And now to our inspiration for today (for details on each project, click on the designer's name and it will take you to their blog)

Debbie Brownmiller

Remember, you MUST use a Cheery Lynn Designs die to enter this challenge.

Keep it Krafty Challenge winner

3:25 AM 1 Comments
What fabulous entries we had last week. Using Random.org, the winner of our Keep It Krafty challenge is

Random Integer Generator

Here are your random numbers:
1
Timestamp: 2015-06-21 04:50:05 UTC
 
Congratulations, Michelle.  Please contact me for your $20 shopping spree to Cheery Lynn Designs.  Be sure to grab the winner's badge from the right sidebar for display on your blog.  And thank you to everyone who joined in on the challenge.  We hope to see you again in this week's Anything Goes challenge.

Saturday, June 20, 2015

Summer Garden by Julie Lavalette

3:30 AM 2 Comments

Hi Everyone, It's Julie here today. Isn't it lovely the summer flowers are starting to bloom and I thought this week I would bring part of my garden onto my card.


I started by layering my Flourish onto my card as a background accent and added my Pocket Watch with silicone glue.


My leaves were cut out in green card stock and shaded with distress ink, rolling my edges and layering on with Silicone to give a natural look to my leaves. My Flowers were coloured with Copics and a little Flower Soft added to the centres.


We have a Baby Blue Tit which frequents our garden regularly and I just had to include him on my card. I shaded him with Distress inks and used a Fineliner to hi light the black.


Adding Stickles, bling and a stamped sentiment which was fussy cut to finish.

Thanks for stopping by to see my post today. Good luck to everyone entering our Weekly Challenge.

Cheery Lynn Dies used:

Julie x


Friday, June 19, 2015

Wishing you a Happily Ever After by Corina Finley

3:30 AM 0 Comments

Hello!

Corina here with you today - so glad you could join me! With the lovely weather of Summer, Weddings season is upon us! I created this card using four dies, I wanted to use dies that I have not used for awhile! 


As you can see above, the strip in the center is the Dove Border die, cut from black cardstock and backed with white cardstock. I trimmed the ends on both sides to make it smaller and fit on the panel. The border is cut from turquoise pattern paper using the Siena Double Edge Border die, then cut down the center. I used half on the top and half on the bottom of the Dove Border.
.

 I also inserted the doves which I cut from white cardstock and used foam dots to raise them up to create layering and depth. Shimmer and rhinestones were also added for an elegant look.


Dies used:

Happily ever after (Set of 2) - B542


I hope you will play along in our weekly Cheery Lynn Designs Challenge 189 - Keep it Krafty. You could win a $20 shopping spree at the online Cheery Lynn Design Store.

Thanks for joining me today!

Take care,
Live, Laugh & Create

Thursday, June 18, 2015

Always with Jenny Alia

3:30 AM 1 Comments

Hi, it's Jenny posting today with a new card inspired by this week's Keep it Krafty challenge.  This turned out to be a much simpler card than what I had envisioned but adding more seemed to take away something, so I left it simple.


I started by layering background papers.  I used a 5.5" square kraft card for the card base and cut the stitched pattern using the Square Stitch Nesting Set die.  I cut a piece of white card stock to a 5.25" square and distressed the edges. I topped this with a smaller red 4.75" square layer before adding two more layers cut with the Pierced Stacker # 3 die.  


Using the die as a stencil I used two colors of distress ink to color the smaller Pierced Stacker.   The larger pierced stacker was ebmossed using the Diamonds and Starburst Embossing plate.  I added a neutral distress ink to the plate before embossing.

The heart was paper pieced.  It was cut with white paper, cut again with black and red and I cut pieces of the black and red die cuts and glued them to the white layer.  I glued the always word on top for a finishing touch. 

Cheery Lynn Dies

Thanks for visiting and I hope you can join the Keep it Krafty challenge for a chance to win a $20 voucher to the Cheery Lynn shop.  

Hugs, Jenny

Wednesday, June 17, 2015

Steampunk Birthday With Lisa Blastick

3:30 AM 3 Comments

Hi, Its Lisa here this week sharing with you a fun steampunk card using several diecuts from Cheery Lynn Designs. I usually make a card only once. However, I LOVE how this one turned out that I'm going to have to make another for my own stash. :) 


I added a few pop dots under some of the Gears, Hot Air Balloons W/Angel Wings, and Hearts & Gears. The Steampunk Corners are very delicate and are perfect for every steampunk project. The Clock W/Angel Wing was originally going to be in the center, then somehow I accidentally tore one side.. :( But I'm kind of glad it is offset now, funny how a boo-boo can work out in the end :) I stamped some tiny steampunk butterflies, a ruler and embossed Happy Birthday, then fussy cut them all out.


Cheery Lynn Diecuts Used:


Thank you so much for stopping by today! Be sure to stop by this week's challenge "Keep It Krafty" challenge for a chance to win $20 to the Cheery Lynn Designs Store
 Have a great week!
          Hugs, Lisa                                                                                                                                                                                                                                                                                                                                                                                                                                     

Tuesday, June 16, 2015

Graduation Card by Karen Maldonado

3:30 AM 0 Comments

Hi there Cheery Lynn friends!
Karen here today sharing a bright and cheery graduation card!

I started by creating a 4.5 x 5.5 card base in black card stock.  Then, I layered
some beautiful designer papers to the top.

Next, I used the diploma and cap from the newest Graduation Set (set of 2),
and cut my pieces using black and white cardstock.
Then, I created a beautiful flower using my Gardenia Strip &  Rose Strip
I placed all these pieces onto the Oval Little Stackers Nesting die and then
layered it onto the Pierced Stacker #2 piece.

I die cut the sentiment using the smallest die from the Graduation (set of 2),
placed it onto the card, and then finally added one of the dies
from the Small Exotic Butterflies #1 set!  Lastly, I placed some pearls
onto the butterfly and to the card corners!!


I think it will be a perfect card to give for graduation, along with a nice
gift certificate or some cash tucked away inside just for that special gal!

List of Cheery Lynn dies used: 


It's still early in the week and plenty of time
to join in on this week's challenge!!

Good luck and I look forward to seeing what you create this week!!

Hugs & Smiles,
Karen

Copyright Statement


All content, including designs, pictures and words are the exclusive property of the author of each blog post. Information shared here is for inspiration only and may not be copied for publication, competition or profit. Thank you for your cooperation.

SOCIAL MEDIA 2


Follow Us @jointhemakersmovement


All content, including designs, pictures and words are the exclusive property of the author of each blog post.
Information shared here is for inspiration only and may not be copied for publication, competition or profit. Thank you for your cooperation.